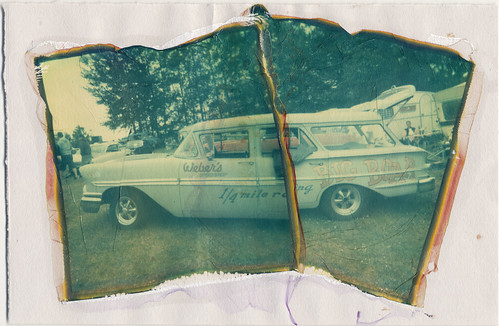
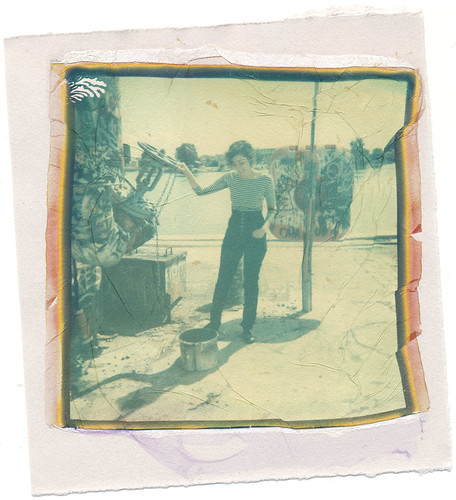
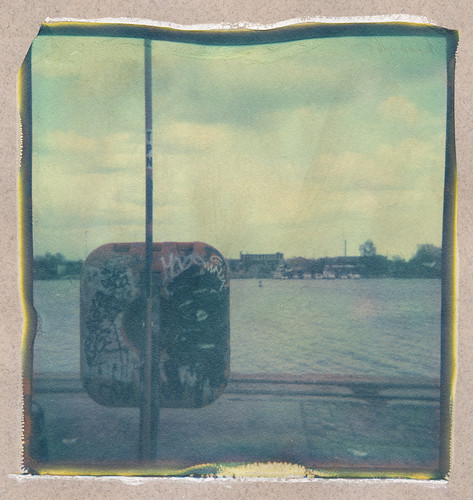
TZ Artistic Edge Cut diptych on Canson paper
Here you go! A tutorial on polaroid emulsion lifts with integral film. I've tried this successfully with TZ Artistic, TZ Artistic Edge Cut and all of the PX/PZ films from The Impossible Project - I think regular TimeZero works as well, but I haven't tried it. 600, 779, SX70 Blend and TZA Fade to Black don't work.
When you do an emulsion lift (or emulsion transfer, as it's also sometimes known) you're basically lifting out the emulsion layer and placing it onto something else - paper, glass, wood, textile, etc. It gives you the opportunity to tweak the composition or tone of the original image, as well as to play with elements such as texture, watercolour, scratching, distortion or destruction.
They can be a bit fiddly at first, but it's well worth the trouble - even when you think it's going totally wrong it may still turn out fantastic. It gets easier with practice but it does require patience. Watercolour paper is the easiest to start with, so that is what I've used for this tutorial.
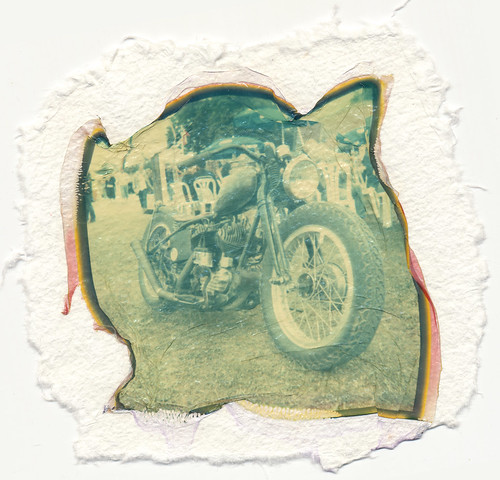
TZ Artistic Edge Cut on Brittania 300g/m2 matt paper
You need:
- An exposed polaroid.
- A piece of watercolour paper (or similar) at least a little bigger than the polaroid.
- A tray or sink with a surface area at least twice the size of your paper (or whatever you're using).
- A small utility knife, scalpel or a pair of scissors.
- A watercolour brush.
- Hot water (the hottest from your tap is good enough).
- (Optional) glossy varnish such as the acrylic varnish from Talens.
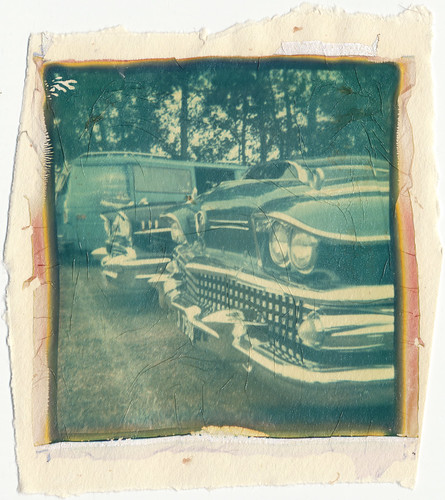
TZ Artistic on Brittania 300g/m2 matt paper
Before we begin, it helps to know a bit more about the layers you'll encounter once you start taking apart the polaroid. From back to front: First, there's the back piece which contains the negative, below which sits the empty chemical pod. Between the negative and the emulsion layers is a layer of white chemicals, which acts as a background for the highlights in the picture. After this comes the emulsion layer, which is the picture layer. Then there's the mylar, which is a sheet of clear plastic, and finally everything's wrapped up in a mask made of white foil.

TZ Artistic Edge Cut on Canson (left) & Brittania 300g/m2 matt paper (right)
The basic procedure:
- Get your tools ready and prepare a sink or tray with hot water.
- Place the polaroid picture side down on a surface, then slide your knife under the white mask on all four sides, loosening it or cutting it off entirely. Remove all of the white mask from the back and front of the polaroid.
- Carefully peel the layers apart - if the emulsion isn't coming off with the mylar or if it's sticking to the negative in places - STOP! It's not dry enough, leave it to dry a few more hours (see the note on peeling further down the page).
- Save the negative if you want to wash it and scan it later, but discard the chemical pod. Remove the two metallic strips of tape on the sides and the spongy bit up top (if they're stubborn, try again after the picture's soaked a little while). Now all you have left is the mylar with the emulsion sticking to it.
- Submerge the mylar and emulsion in the water and let it soak for a couple of minutes, then take a watercolour brush and lightly brush the emulsion side - if the polaroid's fairly fresh the white chemical residue comes off in a cloud, if it's a little older, and the chemicals have dried and cracked, it'll flake off, but it sometimes takes a little extra work. Be careful not to damage the emulsion.
- Use a fingernail to scrape the edges of the emulsion off the mylar - don't worry the edges are tougher than the rest of the emulsion (some people simply cut the edges off, I leave them on because I think they create a nice frame).
- Use the watercolour brush to gently push the emulsion off the mylar starting at the corners. It should come off easily, if it doesn't leave it to soak a little longer. Once the entire emulsion layer is floating free discard the mylar.
- You now have what looks like a tiny, colourful sheet billowing in the wind. Don't worry if it balls up, it's not sticky, so that won't ruin it. Locate two corners with your fingers and gently pull through the water to spread the emulsion out, then flip it so the picture side is facing up. The emulsion is tougher than it looks, but be especially careful if it has a tear someplace.
- Try to get the emulsion to float near the surface - it'll immediately start sinking and balling up again, so it takes a little patience - submerge your paper and carefully scoop up the emulsion from below. Again, this takes a little patience, the trick is to try to work with the water, not against it. Once you have two adjacent corners of the emulsion where you want them to be on your paper, you can hold down the corners and use the water to straighten out the rest of the image by submerging one corner at the time in the water and pulling it out again.
- Once everything's where you want it to be, pull the paper with the emulsion out of the water and use the watercolour brush to arrange the emulsion exactly how you want it, then carefully press down the brush all over to get rid of any air bubbles.
- Leave it out to dry. Add watercolours if you wish, then leave to dry again. If you want a little more depth or contrast - and some gloss - finish with a layer of varnish.


The Impossible Project PZ 600 peeled after 2 minutes, on Brittania 300g/m2 matt paper. Accidentally put the emulsion on the wrong way around and didn't even realise it until I saw the two scans side by side!


The Impossible Project PX 100FF on Brittania 300g/m2 matt paper (peeled while still wet)
A note on peeling:
A polaroid needs to dry out completely before peeling, otherwise the emulsion sticks to the negative and it stretches and rips - TZ Artistic takes about 5 hours to dry.
The exception to this rule is the new films from The Impossible Project, which are the easiest to peel right after the development is finished, so 2-10 minutes after taking the picture. If you miss this window, there are two different ways to peel them, but it's a bit of a hassle as they typically take several weeks to dry. One way is to pop the shot in the freezer for a couple of hours before peeling, this way you avoid colour changing and crystals, and the shot peels effortlessly. If you leave the shot to dry at room temperature the procedure is a little different, and you run the risk of colour changing and crystals forming (especially with the First Flush editions). My advice when drying at room temperature is to strip all of the mask as quickly as possible, then leave the picture to dry a few days. Start peeling very slowly from the corners, but as soon as it starts sticking, leave it to dry a few more days, then repeat. This takes a loooong time, but in the end the emulsion will be in one piece.
A polaroid can't be too old to peel - or at least I haven't encountered one that was too old!

The Impossible Project PX 70FF, the slow peel left a circular pattern in the white chemical layer (left) emulsion lift on lavender toned Canson paper (right).
Using toned paper:
Often plain white watercolour paper comes off harsh against the polaroid, so I started experimenting with toned papers. As the highlights in the picture are transparent there's a limit to how dark you can go, or the picture will end up very dark. I find it works well to either go a bit opposite of the picture (i.e. choose a paper with a warm tone for a picture with a cool tone) or play up a highlight colour - although sometimes I do go against my own advice as in the picture above, where I chose a lavender toned paper to play up the pastel quality of the picture.
Don't worry if you don't like the results, just put the paper back in the water, lift the emulsion again, and use a different colour paper this time.
TZ Artistic Edge Cut on yellow toned Canson paper (left) & TZ Artistic on dark beige Canson paper (right)
Texture:
Using textured paper looks awesome in real life, but doesn't scan so well, so you may want to think about how you're going to use the finished picture. Most watercolour paper has a smooth and a textured side. Another way to add texture is, if the white chemical layer has been left to dry and crack, to leave parts of it on the back of the emulsion. This gives you a cracked texture, but be careful, the finished emulsion lift will be a lot more delicate.
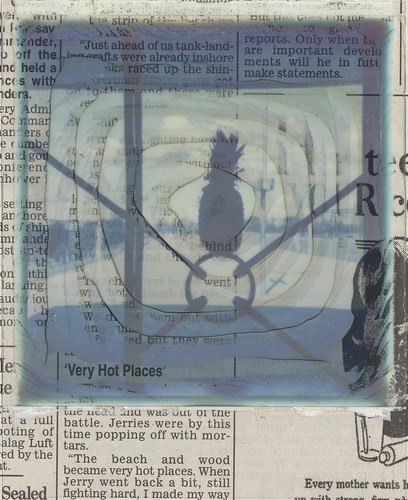
Below is one of my favourite lifts (on handmade paper from India, which almost has a cloth-like appearance).
TZ Artistic Edge Cut on Indian handmade paper

The Impossible Project PZ 600 with cracked white layer on Brittania 300g/m2 matt paper
Diptychs/polyptychs:
If you're up for it, try lifting several emulsions to the same piece of paper. It's a little harder, but one way of achieving a more precise placement (without one of the emulsions sliding off into the water) is to use the mylar from the front of the polaroid to help you.
So, instead of discarding the mylar, you'll want to keep it back. In step 8-9, instead of flipping the emulsion, you'll want it to keep floating with the picture side down. Wet the paper, but use the mylar to pick up the emulsion and place it where you want it on the paper. Instead of lifting off the mylar, press down, and slide it off to the side, or else the emulsion comes off with the mylar. Finally, use the watercolour brush to fine tune - being extra careful to get rid of air bubbles. Repeat until all of your emulsions are on the paper, then finish as usual.
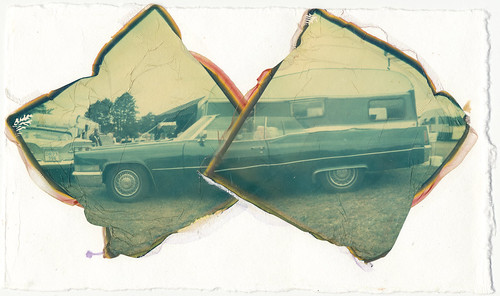
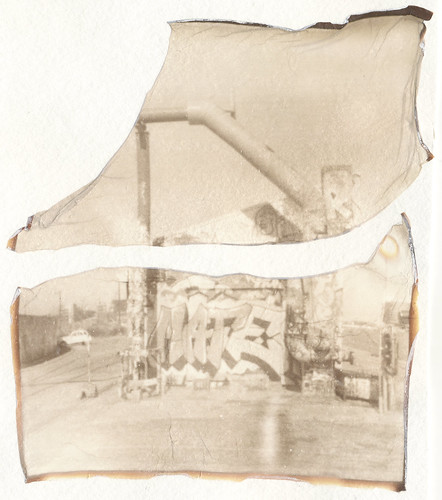
TZ Artistic Edge Cut diptych on Brittania 300g/m2 matt paper