 |
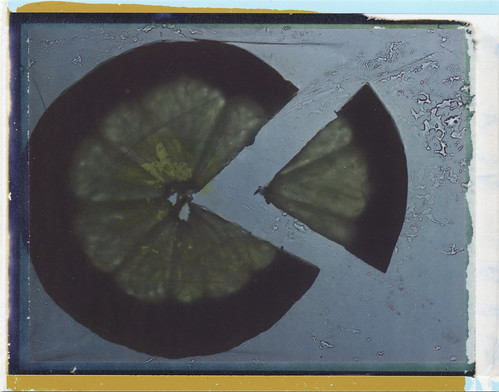
| a lemon slice on polaroid studio 125i with a single white LED as light source |
A polagram is a photogram made using instant film instead of photographic paper. They are very easy to make, with a little imagination and not much effort it's possible to get some really interesting results. Here's a short tutorial.
All you need is:
 |
| tools |
- A camera. Any polaroid camera or back will do. If you're using a pack film camera it doesn't even have to work - all you need are the rollers. It's possible to use an Instax as well, but I don't have one so I don't know the exact procedure - if you're able to work it out feel free to educate me!
- Film that fits the camera/back/rollers. It's easier to manage the exposure with a lower iso, but it is still possible with 600 film. I'd stay clear of 1500 and 3000 iso, though!
- A subject. In this case I'm using a tomato, but what works best are objects that are either somewhat translucent (i.e. leaves, fruit, coloured glass beads) or have a clearly defined and easily recognisable outline (i.e. buttons, alphabet cereal, I've even seen someone use a small handgun on 4x5 film) - your imagination is really the limit.
- A light source. A flash is going to be too powerful. What has worked well for me has been a small three LED torch and some coloured single LED light toys. I have also heard of people simply switching the overhead lights on and off really fast.
- Clear plastic wrap if you're using food or other messy objects.
- A completely dark space.
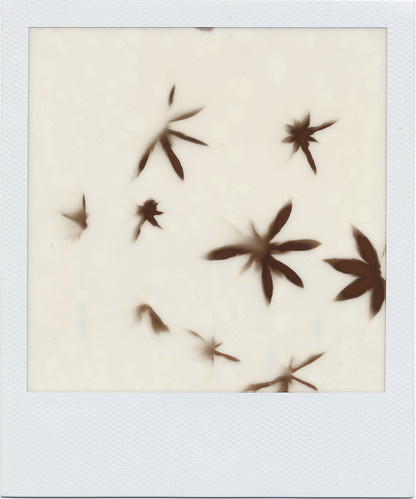

star anise & note shaped buttons on the impossible project px 600ff with a small torch as light source
How to do it:
- Prepare the items you're going to use as your subject. You might want to take a little time to compose your picture on top of an empty film pack (especially if you're trying out something more intricate - but remember that the final picture is going to be mirrored!) However, many objects look great simply randomly scattered. If you're using plastic wrap, tear off a piece and place the items on top of it while you're still in the light.
- Load your camera with film.
- Bring your camera, subject matter and light source into the dark space. Make sure you have everything, arrange it so you can find it in the dark, then turn out the light.
- Pull the film pack out of your camera and place it on a surface. Make sure the picture side is facing up by feeling for the edges of the picture.
- Arrange your items on top of the pack to compose your picture (remember that the final picture is going to be mirrored). If you're using plastic wrap just stretch it over the pack - don't worry if it bunches up in places, at most it'll add a nice texture to the background.
- Grab your light source and briefly flash the film. The closer to the film you hold the light source the higher the exposure, so you'll have to adjust the distance according to the strength of the light source and the translucency of your objects - a good place to start is about 1 ½ meters from the film with a small torch.
- Place the film back into the camera and turn on the light. If you're using integral film your camera will automatically eject the picture, if you're using pack film you'll need to pull the tabs as usual, wait for the picture to develop and then peel apart the layers.
- Have a look at the picture, are you happy with it? If yes, great, you're done! If it's too light or too dark, try again, but this time adjust the light accordingly. Usually it takes a couple of tries to get the lighting right.
 |
| et voila! tomato slice on 669 with a small torch as a light source |
Troubleshooting:
- Too dark. Either flash the film a little longer, use a bigger torch, move the torch closer to the film, or flash multiple times. By flashing several times from multiple directions using different colours you can create interesting shadow effects.
- Too light. Either flash the film more briefly, use a smaller torch, move the torch further away from the film or direct it away from the film, letting it bounce off the wall or the ceiling.
- Completely blank. If it's white (or black if you're using Fuji fp-100c): make sure the dark space is dark enough. If it's grayish or brownish: are the chemicals dried up? Was the film pack upside down?
 |
| lightbulb on polaroid studio 125i with a single green LED as a light source |
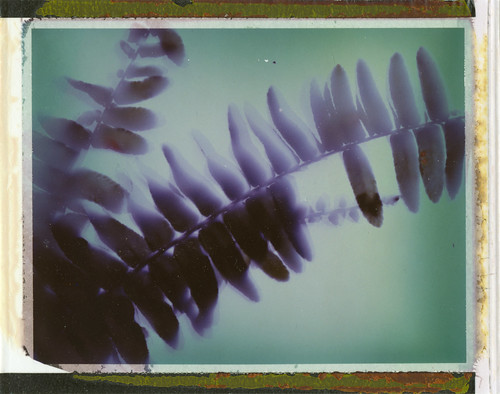 |
| fern on expired fuji fp-100c with a small torch as a light source |
For more inspiration check out the Polagram group on flickr, the pool is full of amazing examples and there are lots of tips and tricks in the discussions.
 |
| pomegranate seeds on polaroid studio 125i with a small torch as a light source |
2 comments:
cool idea!
yes, isn't it? I totally wish I could take credit for it, but that really goes to the awesome people in the Polagram group ;)
Post a Comment